
The Winter Solstices has occurred and it is officially winter.
The Christmas season celebrations are almost over (thank goodness my waistline can’t take anymore) with only the ringing in of the new year left to be accomplished.
The cold grey days of winter loom ahead of us warmed by the cheery thought of “only” 79 days till we celebrate the return of Spring.
What to do? What to do?
Start seeds of course!!
I am talking about Winter Sowing. “Winter Sowing” is not a new practice and I know I am a little late to the party, as this will be my first year giving this a go, but I am so excited to get started.
Winter sowing is not the same as starting seeds in your home. Over the years I have started many containers of seeds in my home to get a head start on spring planting. I initially started them in a bright windowed location of my home and then I graduated to shelves and grow lights. I have had pretty good success BUT indoor growing does come with a few draw backs.
1) The process is messy. At least for me it is – I don’t know how it happens but when I am working with dirt it gets everywhere!! I like to compare myself to a chef or baker when they are creating a kitchen masterpiece– every pot, pan, and utensil used; flour on the counter, their shirt and a bit on their cheek. Luckily for me I have an unfinished basement that pretty much contains the mess.
2) Seed trays take space: How many sunny window sills do you have that you can dedicate to the seedlings for three months? Is the house kitty going to willing share the sunshine or lay on top of the growing trays?
3) Grow shelves and light set ups can be a bit expensive – to say the least.
4) If your seedlings are started to soon they could get very large and leggy before Mother Nature will roll out the warm weather for outdoor planting.
5) Starting seedlings inside also comes with the challenge of controlling the dreaded damping off fungus and any of the other pests such as fungus gnats and aphids that mysteriously show up on your new baby plants.
These are only a few of the challenges indoor seed starters may face.
An alternative to indoor growing is Winter Sowing.
There are many YouTuber and Bloggers that discuss the winter sowing methods. My research shows that Trudi Greissle Davidoff is the mother of Winter Sowing. Her method of seed starting takes the guess work out of deciding when to start seeds for the best success, as well as, eliminating the need for lights and indoor space. Seeds are designed by nature to know when to wake up and begin to grow. They depend on light and temperature to clue them in to the coming of spring. Trudi’s method lets Mother Nature take care of all the hard work and decision making. All we need to do is collect some containers, potting soil, seeds and all important labels and set the process in motion.
What kind of containers should you use?
It seems most folks like to use free recycled gallon milk or water jugs, but just about any container: juice jugs, cat litter jugs, salad bins, take out containers, pop bottles – anything that is clear plastic or slightly opaque white that will hold at least 3 inches of potting soil should work. Many milk jugs are made of heavy white or yellow plastic, which will block sunlight, and are not a good choice. Be cautious you don’t use anything too large that once planted it is too heavy to move.
What do you grow you ask? Virtually anything – Fruits, Veggies, Herbs, Trees, Shrubs and Flowers!!
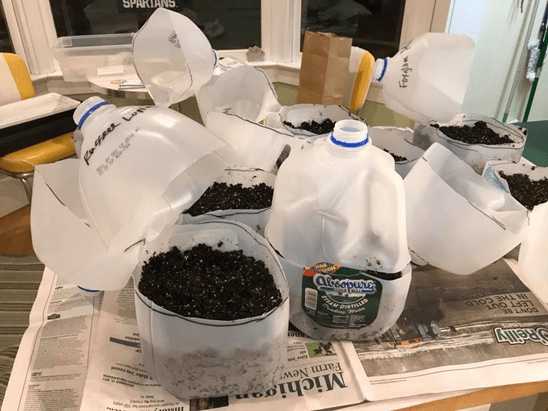
Follow the steps below to make your own one-piece winter sowing mini greenhouses.
1. Wash the container of choice thoroughly and let it dry. Discard the cap.
2. Using a sharp knife, sharp tipped scissors, or drill, punch a drainage holes in the center of the bottom edge of each side panel.
3. Mark a line around the center of the jug (line will be horizontal), using a permanent marker. This is your line to cut the jug in half.
4. Cut around the jug along the line, leave two inches uncut below the handle – this will serve as a hinge.
5. Fill the container with pre moistened soil to within an inch of the cut. The soil should be damp but not soggy. Does it hold it shape when you squeeze it like a snowball? That’s good. (You don’t want it to drip any water though)
6 .Sow seeds according to package directions, and water them in.
7. It is a good idea to put a label inside the jug – I use pencil on 5 inch sections of vinyl blinds to create labels – believe it or not, this does not fade or wash off. Include variety and date planted- you will want to know both later on. Also for easy, early on, identification write the same information on the outside of the container with a permanent marker – it will probably fade away by the time you are ready to plant but you have the label inside as back up.
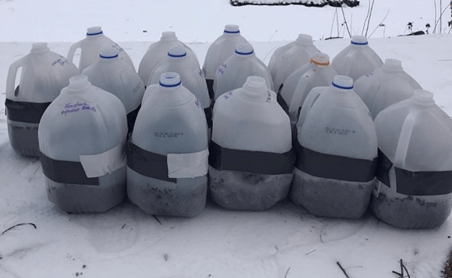
8. Close the jug, and secure with a long piece of duct tape. I will be putting a mark on my table to pull and cut the correct length. Then securely close the flaps together with the tape around the opening.
9. Set it outside for the winter. And let winter do what winter does – snow, rain, wind, sun, and storm. Your seeds will be just fine.
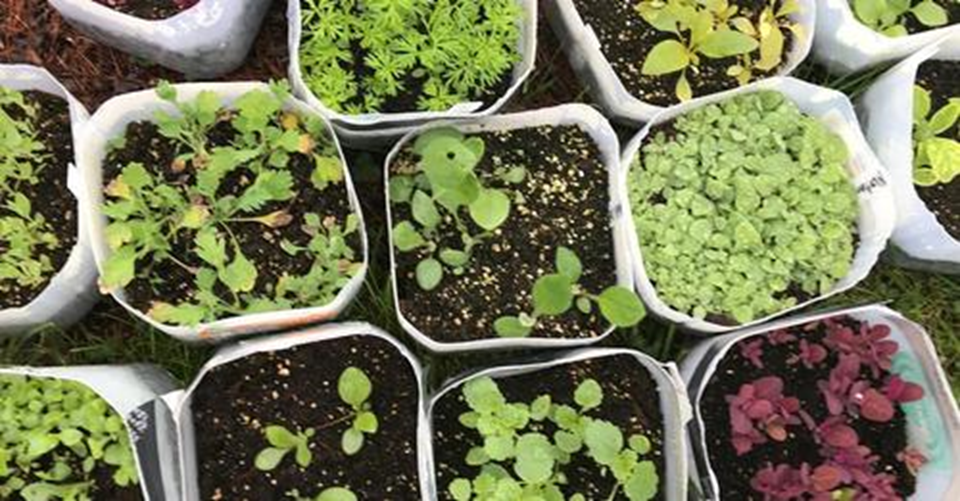
Now you wait for Mother Nature to do the rest of the work. As the days begin to lengthen and warm the seeds will know it is their time to wake up and shine. In a couple months you get these gorgeous, healthy, beautiful, hardened (which means ready for the weather) seedlings for penny’s.
Overnight low temperatures will still be dipping below freezing, but there’s no need to panic, your seedlings will be just fine. Believe it or not, daytime highs are a bigger concern, threatening baked or steamed plants. Depending on where you live moving your containers under a tree or other semi shady area might be a good idea. As the days get warmer gradually begin to prop the lids open to release excess heat and let fresh air in. You can close the lids at night if the overnight lows dip below 40 degrees….
Your babies will be fine and ready to plant by your last frost date. For me, that will be about Mother’s Day. I cannot think of a better way to spend some time but mothering my garden.
From my garden to yours – Happy Gardening!!
